MacBook vs Windows Laptop: A Friendly Guide for Design Students

Estimated reading time: 48 minutes

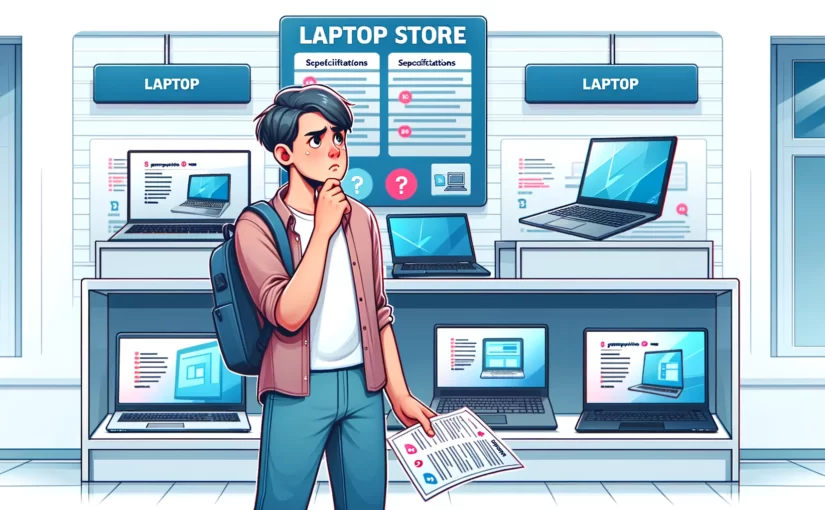
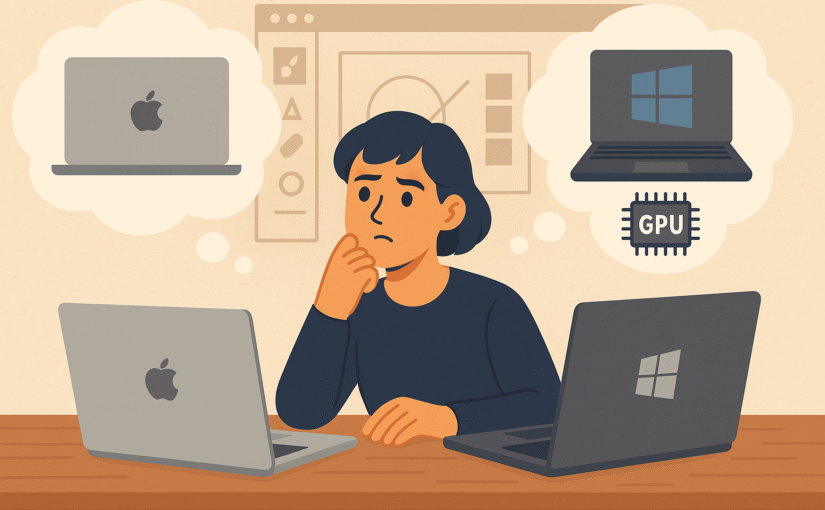
Choosing your primary computer for a 4-year design program is a big decision. Many design students find themselves torn between buying a sleek Apple MacBook or a Windows laptop (often a gaming or workstation class machine with a powerful GPU) in the ₹1,00,000–₹1,50,000 budget range. Both options have their merits, but your goal as a student is to maximize value, performance, and flexibility during your academic journey. In this blog post, we’ll break down the key considerations – from getting the best bang for your buck, to software and GPU needs, to the implications of Apple’s ecosystem and repair costs – all in a friendly, honest, and helpful tone. By the end, you should have a clearer idea of which path suits your needs. Let’s dive in!

Getting the Most Value for Your Money

For students on a budget, value for money is crucial. You want a machine that will last four years and handle everything you throw at it, without paying a premium just for a logo. Here’s how MacBooks and Windows laptops compare in terms of cost and hardware:

  • Windows laptops offer more performance per rupee. Because there’s a huge range of Windows-based laptops from various brands, you can often find powerful specs at lower prices. In fact, performance-per-dollar (or rupee) tends to favor PCs built with budget in mind. For example, it’s possible to configure a capable Windows design laptop for under $1000 (around ₹80k) if you choose specs wisely. In contrast, Apple has fixed configurations with premium components and price tags to match. You’re generally paying extra for the Mac’s build quality and brand, which might mean slightly less raw hardware power for the same money.
  • Examples in this price range: Around ₹1.2–1.5 lakh, a Windows laptop might include a high-end Intel Core i7 or AMD Ryzen processor, 16 GB RAM, 512 GB SSD, and a discrete NVIDIA RTX-series GPU (more on the GPU soon), plus a standard 15.6-inch display. A MacBook in this range (likely a 13-inch MacBook Pro or 14-inch base model) would offer an Apple M1/M2 chip (with integrated GPU), 8–16 GB unified memory, 512 GB SSD, and a high-resolution Retina display. The Mac will shine in areas like screen quality and battery life, but the Windows machine may outperform it in pure graphics horsepower for the price. In one comparison, a Dell XPS 15 (Windows) with an NVIDIA RTX 3050 was priced similarly to a 14-inch MacBook Pro; the Dell delivered excellent specs, while the MacBook Pro boasted a stunning mini-LED display and longer battery life.
  • Upgrade flexibility: Another aspect of value is how long the laptop can stay relevant. Windows laptops (and desktops) often allow upgrading components like RAM or storage later on. This means you could start with 16 GB RAM and add more next year if needed, extending the machine’s life. Macs, on the other hand, are mostly not user-upgradeable – memory and storage are soldered in most modern MacBooks. If you think you’ll need more power later, a PC gives you that path, whereas with a Mac you have to buy the highest spec up front (which is costly) or replace the machine entirely down the road. The ability to swap or upgrade parts can greatly increase the lifespan of a PC by letting you improve it over time.

In short, if budget and value are top priorities, a Windows laptop tends to offer more hardware muscle for the money. Macs are premium devices that emphasize a balanced package (great display, build quality, optimized software-hardware integration) but you pay a premium for those qualities. As a student, stretching your budget to get better performance (especially a dedicated GPU and more RAM) can be a smarter move than paying for extras you might not fully utilize right now.

GPU Acceleration – Why It Matters for Design

One major reason many design students consider a “gaming” or high-performance Windows laptop is the GPU (Graphics Processing Unit). In creative fields like animation, 3D modeling, rendering, visual effects, game design, or even modern graphic design tools, a strong GPU can significantly speed up your workflow. Here’s why GPU acceleration is essential and how Macs and PCs differ:

  • Many design and 3D apps rely on GPU power. Tasks like 3D rendering, real-time animation playback, video editing effects (e.g. color grading, transitions), and even certain filters in Photoshop or Illustrator can use the GPU to render faster. If you’ll be working with tools such as Blender, Maya, 3ds Max, Cinema 4D, Unity/Unreal Engine, or Adobe After Effects, having a powerful dedicated graphics card will save you time. For instance, motion graphics and 3D students often find that a PC with a good NVIDIA GPU renders complex scenes noticeably faster than a MacBook with integrated graphics. In fact, serious 3D work generally favors a PC; heavy-hitter applications like Autodesk 3ds Max and some industry renderers are essentially built around Windows and high-end GPU support.
  • Windows laptops can have high-end GPUs; Macs have decent but limited GPUs. Modern MacBooks (especially the Pro models) have fairly capable integrated GPUs in the Apple Silicon chips, roughly on par with mid-range graphics performance. However, with Windows you have the option of NVIDIA GeForce/RTX or AMD Radeon discrete GPUs, which at the high end are much more powerful than anything in a MacBook today. For example, an NVIDIA RTX 4060 or 4070 laptop GPU will outperform an M2 Mac’s graphics in GPU-accelerated tasks. One report notes that NVIDIA’s GPUs are “far more powerful than what you can currently get on Apple silicon, so GPU-accelerated [tasks] are much faster on PC workstations using these GPUs.” This means if your software can leverage CUDA cores (NVIDIA’s technology) or heavy 3D rendering, a Windows laptop with an RTX GPU can chew through those tasks noticeably quicker.
  • Longevity and support for GPU tech: Another consideration is evolving software and features. Many cutting-edge developments in design and rendering (like real-time ray tracing, or AI-based features in software) often launch with NVIDIA GPU support first. Windows machines give you access to these advancements immediately (since you can use NVIDIA or the latest AMD cards). Apple’s GPUs have their own strengths (for example, they are very power-efficient and great for battery life on the go), but they might not support every industry-standard technology. If a new open-source GPU rendering engine uses CUDA, it will run on an NVIDIA-equipped Windows PC, but not on a Mac (since Apple no longer supports NVIDIA GPUs at all). Apple’s Metal and other frameworks are robust, but they’re unique to Apple; the broader industry tends to build on Windows standards like OpenGL, DirectX, CUDA, etc. Thus, having a Windows laptop with a strong GPU ensures maximum compatibility with a wide array of GPU-accelerated tools.
  • When might GPU not matter as much? If your design work is mostly 2D graphic design, UI/UX design, web design, or writing/code, then any modern integrated graphics (including what’s in an M2 MacBook Air or a basic PC laptop) will be fine. Macs excel in many 2D design workflows and their GPUs handle things like Adobe Photoshop and Illustrator quite well, sometimes even beating PCs in certain optimizations. But the moment you step into heavier tasks (think rendering a 3D product model, running an architecture walkthrough, or animating in After Effects with lots of effects), having an NVIDIA RTX or similar can dramatically speed up rendering. In After Effects, for example, one test found a new M3 MacBook Pro was great, but a desktop PC with a top-tier CPU and multiple GPUs still pulled ahead for the heaviest multi-frame renders. The takeaway: for intensive graphics work, more GPU = better, and Windows laptops give you the option to have more GPU.

In summary, consider the kind of work you’ll be doing in the next few years. Since design students often explore various disciplines, it’s wise to have a machine that won’t limit you. A Windows laptop with a strong GPU ensures you can dive into 3D modeling, AR/VR, generative AI art tools, or any graphically demanding project without worrying if your hardware can keep up. Macs are catching up in GPU performance with each chip generation, but PCs still hold the edge in raw graphics power and options.

Software Compatibility & Tool Availability

Beyond hardware, think about the software you’ll need. One of the biggest arguments in the Mac vs Windows debate for students is software compatibility. While a lot of popular design software is cross-platform (Adobe Creative Cloud apps, for instance, run on both macOS and Windows), there are important tools (including free or student-license software) that might be Windows-only. As a student in an “exploratory phase,” you don’t want to be locked out of software options. Let’s break it down:

  • Windows supports almost all software, period. The Windows platform has the broadest software compatibility in general. Nearly any application or game is made for Windows, and often Windows versions get updates first. macOS, while it has plenty of native software, does miss out on some notable titles commonly used in design/engineering academia. For example, Autodesk Revit (architecture BIM software) and 3ds Max (3D modeling/animation) are Windows-only; they have no native Mac versions. Similarly, SOLIDWORKS (mechanical CAD) and Altium Designer (PCB design) do not run on macOS. If your course or project requires these, on a Mac you’d have to find a workaround (like running Windows in a virtual machine, which may be slow or not fully supported for heavy 3D). A student on Apple’s support forum discovered this the hard way: “I had to download SolidWorks and Altium Designer but I could not… they are not available for macOS.” This can be a showstopper if your curriculum uses those programs.
  • Many free or open-source tools favor Windows. As a student, you might use free/open-source software to save money or experiment. While a lot of open-source design software is cross-platform (e.g. Blender, GIMP, Inkscape all have Mac versions), there are smaller niche tools and plugins that might only offer Windows executables. Additionally, some free student versions of commercial software run only on Windows. For instance, some schools use a free student version of CATIA or ANSYS for engineering design – often Windows only. Even where Mac versions exist, they might be less optimized. Windows also has a huge library of freeware utilities (font managers, 3D converters, etc.) that may not have Mac equivalents. In a Mac vs PC graphic design article, it was noted that the availability of essential software determines what platform you can consider – and while both platforms cover most mainstream apps, Macs surprisingly lack depth in 3D/animation compared to Windows. So with Windows, you have a “try anything” freedom: you can install virtually any software your professors or peers suggest without worrying about OS support.
  • Workarounds exist, but they’re not always ideal. It’s true that you can run Windows on a Mac in some fashion – historically via Boot Camp (on older Intel Macs) or now via virtual machines like Parallels. However, if you buy a new Apple Silicon Mac (M1/M2 chip), Boot Camp (dual-booting Windows) is not available. Your only option would be virtualization, which currently means running a special ARM version of Windows 11 and then hoping the Windows apps (often compiled for Intel/AMD) will work through emulation. This is not a perfect solution and may not support heavy 3D apps or certain drivers. Parallels Desktop can run many Windows apps on M1/M2 Macs, but graphics-intensive software may suffer performance issues or not run at all. On the flip side, on a Windows laptop you could theoretically run a Linux or even macOS VM if needed for some reason – but you likely won’t need to, since most tools you need will have a Windows version. The bottom line is that having Windows OS gives you the widest net in terms of catching any software you might need over 4 years.
  • Course and industry standards: It’s worth checking if your college or course has a platform preference. Some design schools are Mac-centric (especially in graphic design or media arts programs where they use a lot of Mac labs). Others, like architecture or product design programs, might lean Windows because of software like Revit, Rhino, or SolidWorks. Many schools actually have both platforms available in labs. If your school uses mainly Adobe CC, both Mac and PC are fine. If they use something like Rhino 3D with Grasshopper – note: Rhino is cross-platform now, but Grasshopper (its plugin) historically had better support on Windows. Always ensure that choosing a Mac won’t force you to miss out or use slower workarounds for a tool you need. It’s telling that even on Apple’s own forums, advisors suggest “check with your school what apps/software are required for the classes” before choosing, to ensure compatibility.

Summary: To maximize your freedom to experiment with software during college, a Windows laptop is the safer bet because it runs everything. MacBooks run most things (and all the big name design apps like Adobe, AutoCAD, etc. have Mac versions), but there are some gaps that could limit you or cause hassle. If you’re already certain that your focus is, say, digital illustration and you only need Adobe, Figma, Procreate (note: Procreate is iPad-only), etc., a Mac can handle those. But if you’re not sure, or you want to tinker with say a new open-source 3D renderer from GitHub that only releases Windows builds, you’ll be glad you have a PC. Windows = versatility, which is gold in the “exploratory phase” of a design career.

The Apple Ecosystem: Convenience at a Cost

Let’s talk about the famed Apple ecosystem. Apple is known for creating a seamless experience across its devices: MacBooks, iPads, iPhones, AirPods, Apple Watch all work together in ways that can genuinely boost productivity for creative workflows. However, this integration can be a double-edged sword for a student on a budget. On one hand, it’s super convenient; on the other, it nudges you to invest in multiple expensive devices to get the full benefit. Here’s what to consider:

  • Seamless integration perks: If you have an iPhone or iPad already, using a MacBook can be a joy. Features like AirDrop (quickly sending files from your iPad/iPhone to Mac), Handoff (copy on one device, paste on another, or continue browsing on Mac where you left off on phone), and Sidecar (using an iPad as a second screen or drawing tablet for your Mac) are genuinely useful for design students. For instance, you could sketch a concept on an iPad with Apple Pencil and instantly drop it into your MacBook’s Adobe Illustrator file via AirDrop. The ecosystem is designed so your devices complement each other. Apple knows this — it’s part of how they build customer loyalty. As one commentary put it, an iPhone, iPad, and MacBook can all be connected together, allowing users to easily transfer work between devices; this seamless integration makes it hard to switch to another platform. The convenience is real.
  • The nudge to buy more Apple gear: The downside is, to fully leverage these features, you need those other Apple devices. A MacBook on its own is still a great laptop, but you might find yourself tempted to get an iPad for drawing or an iPhone if you’ve never had one, just because you know it would work so nicely with your Mac. Some features are exclusive: for example, you can only use an Apple Watch with an iPhone, and you can only AirDrop between Apple devices. Sidecar (turning iPad into Mac display) obviously requires a Mac + iPad combo. Apple Pencil only works on iPads, not on Mac trackpads or anything. Essentially, Apple’s ecosystem “keeps customers locked in” with these exclusive features. This isn’t inherently bad – many users love it – but it can pull your wallet. If you start with a MacBook now, you might feel later that to get the best workflow you also “need” an iPad (₹30k+ with Pencil) for illustration or note-taking, or you “need” an iPhone to easily sync messages and photos with your Mac, etc. As a student, those are significant extra expenses.
  • Windows ecosystem (or lack thereof): On the Windows side, there isn’t a single unified ecosystem like Apple’s, because multiple companies make Windows devices. Microsoft does offer some integration if you use a Windows laptop with an Android phone (the “Phone Link” app can sync texts/notifications, for example), but it’s nowhere near as seamless as Apple’s continuity features. The upside is you don’t feel as pressured to stick to one brand. You can have a Windows laptop, an Android phone, an iPad, a Wacom tablet, whatever suits your needs, and mix-and-match. It requires a bit more manual effort to, say, transfer files (you might actually email or use cloud storage, vs AirDrop instantaneously). But you can generally find a way to connect things when needed, it just won’t be as magical. The key point: with a Windows PC, you won’t feel “locked in”, and you can freely choose different accessories or upgrades from any manufacturer. Apple’s tight integration is wonderful if you invest in it, but if you’re trying to save money, you might not want to be pulled into buying multiple premium devices at once.
  • Ask yourself about your workflow: If you already use an iPhone and love it, and maybe you see yourself getting an iPad for digital art, then getting a MacBook could make a nice trio – but only if you have the budget either now or later. If you’re not in that position, don’t worry: you can absolutely complete a design degree with a mix of devices. For example, some students use a powerful Windows laptop for the heavy lifting and an iPad (or even just a drawing tablet) for sketching. That way you still get the benefits of an iPad (many artists love the iPad + Apple Pencil with apps like Procreate) without necessarily committing to the Mac for your main computer. We’ll talk more about that combo soon.

In summary, Apple’s ecosystem = convenience and polish, but at a financial cost. It often makes users want the whole set (Mac + iPhone + iPad + …) to unlock all the features. As a student, carefully consider if you truly need those inter-device features now, or if you can achieve your goals with a single device (like a capable Windows laptop) and perhaps cheaper alternatives for other functions. You can always join the Apple club later when you can afford the full buy-in. There’s no sense in stretching your budget for an ecosystem you might not fully utilize during school.

Repairs, Upgrades, and Maintenance

A practical concern that often gets overlooked in the excitement of new tech is repairability and maintenance. University life can be unpredictable – you might accidentally drop your laptop or spill coffee on it during an all-nighter. Also, after a couple of years, you might feel the need to upgrade something (more RAM, bigger storage) to keep up with your projects. Here’s how Macs and Windows laptops differ in this regard:

Many Windows laptops (especially larger models) are built with parts that can be accessed or replaced by technicians – or even by tech-savvy users – relatively easily. In contrast, MacBooks are designed with a sleek unibody and tightly integrated components, making DIY upgrades or repairs difficult. Above, a technician works on a PC motherboard; such internal access is often impractical with Apple’s laptops.

  • Repair costs and policies: Apple is notorious for its expensive repair costs if something goes wrong out of warranty. Their devices use proprietary parts and authorized service centers, which drive up costs. For example, a Wall Street Journal investigation found that Apple quoted $999 (about ₹80k) to fix a MacBook Pro water-damage issue, whereas an independent shop managed to repair it for $325. That’s a huge difference – the Apple price was about as much as a new laptop! Even authorized third-party shops sometimes charge more than Apple for repairs, because they ultimately send the device to Apple and add their own fee. In short, if a Mac fails big-time (logic board issue, etc.) and you’re out of warranty or AppleCare, you could be looking at very steep repair bills. Windows laptops, on the other hand, are made by many vendors; some have official service centers, but you also have the option to use independent repair shops, many of whom can fix common issues (replacing a screen, keyboard, battery, etc.) at a lower cost using generic parts.
  • Repairability and DIY upgrades: Macs have a “sleek design, limited repairs” philosophy. Apple designs everything in the MacBook to be as slim and integrated as possible. This means specialized tools are required to open them, and even then, many components (RAM, SSD on newer models) are soldered to the motherboard. Upgrading your storage or memory by yourself is usually not an option in modern MacBooks. In contrast, many Windows laptops (especially gaming or business laptops) embrace versatility and repair accessibility. They often have standard screws on the bottom that let you remove the cover and access components like RAM sticks, SSDs, or the battery. It’s not true for all – some ultrabooks are also very sealed – but you can choose a model known for upgradability if that’s important to you. The ability to replace a battery on your own (instead of paying Apple a hefty fee) or to add more RAM in your third year when Adobe’s software gets more demanding, can be a lifesaver for a student. PCs also come from various manufacturers who might prioritize repairability; for example, framework laptops or some Dell and Lenovo models are known for easy part replacements.
  • Right to repair and warranty differences: Apple’s tight control means unauthorized repairs can void your warranty, and until recently they didn’t supply parts to independent shops (this is slowly improving with Right-to-Repair movements). With a Windows machine, you generally have more freedom to tinker or use third-party repair services without as much drama. Some laptop brands even have on-site warranty or accidental damage protection at lower costs than AppleCare. AppleCare+ (which is Apple’s extended warranty) is quite expensive, and after it expires you’re on your own for repairs. So, over 4 years, consider the total cost of ownership: the initial price plus potential repair costs. Windows PCs, especially if they use standard components, tend to be cheaper to fix on average. Apple devices, while reliable, can be costly if they do break. Even something like a screen or battery replacement on a MacBook can cost significantly more than on a comparable Windows laptop.
  • Durability: Both MacBooks and premium Windows laptops are built well these days. MacBooks have aluminum bodies that are sturdy, but they can dent or crack under impact. Many Windows laptops in this price range also have metal chassis or rugged designs (some are military-spec tested). There’s not a huge difference in basic durability – it comes down to the specific model. However, if your Mac does need a part replaced, you often must go through Apple (or an authorized shop) due to part pairing and availability. With a PC, after warranty, you could even source a part yourself (like buy a replacement fan or SSD) and fix it with a bit of help from YouTube or a friend, which is next to impossible with Mac’s closed design.

As a student, you should factor in these real-world scenarios. Nobody likes to think about their laptop breaking, but it happens. If it’s your only machine for all your coursework, quick and affordable repair is important. In this category, Windows laptops offer more options and often lower costs. MacBooks can be repaired, of course, but you’ll pay a premium for that sleek engineering. And forget about upgrading internals on a Mac – so choose your specs wisely at purchase. On a PC, you have a safety net of possibly upgrading or repairing economically, which can extend the life of your device well beyond graduation.

Consider a Windows + iPad Combo

An intriguing option, if your budget allows a bit of flexibility, is to have two devices that together cover a lot of ground: a powerful Windows laptop and an Apple iPad. Why this combo? Because it can offer the best of both worlds and is particularly relevant for design students:

  • Power + Portability & Creativity: A Windows laptop will handle all your heavy software – the 3D, the Adobe apps, coding, anything. Meanwhile, an iPad (with Apple Pencil, ideally) is an amazing tool for sketching, note-taking, and quick design tasks on the go. Many students already use iPads for digital drawing or taking class notes (apps like Notability or OneNote). The iPad is lightweight, has a long battery, and can complement your laptop rather than replace it. With a budget of around ₹1.5 lakh, you could potentially buy, say, a ₹1.1 lakh Windows laptop that has beefy specs and an iPad (base iPad or iPad Air in the ₹30–40k range) for the cost of a single high-end MacBook. Instead of spending all ₹1.5L on a MacBook Pro, you get two devices.
  • Using them together: You might wonder, do these two play nice? While you won’t get Apple’s official Sidecar feature with a Windows PC, there are third-party apps like Duet Display or Astropad that allow an iPad to function as a second screen or pen tablet for a Windows machine. It’s not as seamless as on Mac, but it works. For instance, you can draw on the iPad and see it on your Windows Photoshop via these apps. Even without linking them live, you can do ideation sketches on iPad (with apps like Procreate, Concepts, or Adobe Fresco) and then transfer the files to your PC (via cloud or cable) to integrate into bigger projects. Many artists actually prefer drawing on an iPad over using a Wacom with a PC because of the directness of Apple Pencil on a screen.
  • Why not just one device? You might ask, why not just a Surface Pro or something that is both PC and tablet? Those exist (e.g. Microsoft Surface, or convertible touchscreen laptops), but they often involve compromises – either not as powerful as a dedicated laptop GPU, or not as optimized as an iPad for tablet tasks. By having a separate laptop and tablet, you can leverage the full power of each. One MacRumors forum user described their setup: a Windows desktop + iPad for art, and was debating adding a MacBook – they noted that the iPad satisfied their drawing needs and the desktop handled heavy tasks. Another user replied that they use “an iPad alongside a Mac mini as a desktop – it’s a bit the best of both worlds, with less cost than a full good spec MacBook.” This illustrates that pairing an iPad with a non-laptop can indeed save money and give you great capability, versus buying an expensive laptop alone.
  • Budgeting for this approach: Suppose you allocate around ₹1,00,000–1,20,000 for a Windows laptop. You can get a very solid machine in that range (e.g., 13th-gen Core i7, RTX 4050 GPU, 16GB RAM, fast SSD). With the remaining ₹30,000–50,000, you could get an iPad (maybe even an iPad Air or older Pro model) plus an Apple Pencil. That iPad will be your digital notebook and sketchpad – super handy in classes, when brainstorming ideas, or making quick digital art. The Windows laptop will be your workhorse for running all the software (and also for things the iPad can’t do, like full InDesign or advanced 3D). If you had gone with a MacBook Pro 14”, that alone might cost about ₹1.5L and you’d still possibly yearn for an iPad for drawing (because MacBooks don’t have touch or pen input). Some students solve that on Mac by buying a separate Wacom tablet, which itself costs a lot and adds complexity.
  • Flexibility and risk mitigation: There’s also a practical angle – having two devices means if one goes down, you have a backup of sorts. If your Windows laptop is rendering something heavy or is in the repair shop, you still have your iPad to do basic tasks or vice-versa. During online classes or when commuting, sometimes an iPad is more convenient to pull out than a full laptop.

This combo isn’t for everyone (and it does require managing two devices), but it’s worth considering. A Windows laptop + iPad setup can achieve nearly everything a MacBook + iPad setup can, but often for less money or with more power. For example, instead of a MacBook for Photoshop and an iPad for art, you use a PC for Photoshop and the same iPad for art – the workflow can be bridged with cloud storage or apps. Importantly, you don’t have to buy an iPad immediately if funds are tight; you could prioritize the PC now and add a used or new iPad later on. The key message: given the budget, investing in a powerful PC plus a secondary creative device might yield a better educational experience than putting all the budget into one MacBook (which, while great, might leave you wishing for a drawing tablet).

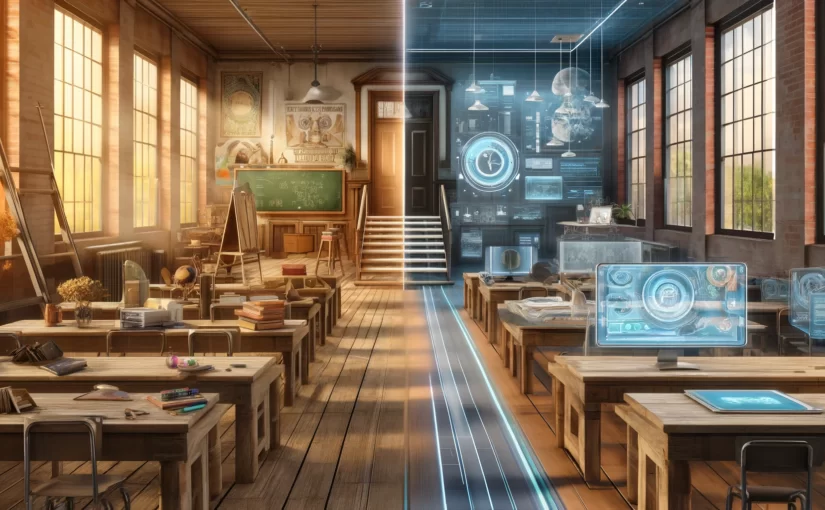
Four Years of Exploration vs. Specializing Later

Your college years in design are a time to explore different disciplines and software, to figure out what you truly enjoy and what tools you prefer. This is an important perspective when choosing your computer: you want a machine that lets you try anything, not one that funnel-locks you into a narrower workflow prematurely.

  • Avoid limiting yourself early: A MacBook might look like the tool all the “cool designers” use, but if owning one means you can’t run a certain software or you feel anxious about experimenting with a new program because it’s not Mac-compatible, that’s a limitation you don’t need. In your first couple of years, you might be doing graphic design; by third year, you could discover a love for 3D modeling or VR or machine learning art – who knows! It’s wise to have hardware that can pivot with your interests. Many students change their focus once they’re exposed to different fields. With a robust Windows laptop, if suddenly you need to use, say, Unity for a VR project or ArcGIS for an environmental design elective, you can. With a Mac, you might hit a wall or have to use the university’s lab computers for those tasks (less convenient). Think of your laptop as a creative enabler: the more it can do, the more you can do.
  • MacBooks can be more appealing once your workflow is defined. This is a point we want to stress: We’re not saying “never buy a MacBook.” But there’s an argument to maybe wait until you know exactly what you need and what your workflow is. By the end of your degree, you might have a clear specialization – maybe you’re going to be a UI/UX designer working mostly with Figma, or an illustrator/graphic designer deep into the Adobe ecosystem, or a video editor. At that stage, you can better assess if a Mac fits perfectly into your established workflow (perhaps because you value its color-accurate display and you know all the apps you use run great on Mac). Also, by then, you might be in a position (with a job or internships) to invest in a Mac without breaking the bank. During college, versatility is probably more valuable than specialization.
  • Industry use and mindset: Historically, it’s true that creative industries had a bias toward Macs (there’s that cliché of “designers use Mac, engineers use PC”). But this has blurred a lot in recent years. Many design agencies and studios are actually platform-agnostic now, using a mix of Mac and PC, or whichever the artist prefers, because Adobe and most major software are on both. The exception is some high-end 3D and CAD, where Windows is still dominant. So you won’t be an oddball using a Windows laptop in design school – plenty of design students do. In fact, in fields like game design, 3D animation, or industrial design, you’ll find more Windows usage due to the software. And if you end up eventually needing MacOS experience, you can always learn it later. It’s generally easier to switch to Mac after knowing Windows (the learning curve is not steep) than vice versa in a context where you suddenly need Windows-only software.
  • Pragmatism for student life: College is also a time where unexpected things happen – maybe you drop your laptop, or maybe you realize you need more storage for all your projects and files. With the hefty tuition and expenses, saving money or having a machine that’s easily fixable is a huge plus. It’s a period of life where being pragmatic might serve you better than going for luxury. A comment we came across humorously phrased it as, “What do you think a computer is for? Looking awesome?” – basically saying the point is to get the work done. While that’s a bit blunt, it’s a good reminder not to choose a Mac just for the aesthetics or prestige. Choose the tool that will let you do everything, learn everything, and not cause undue stress or cost. For many students, that tool is a Windows laptop.

By the time you graduate, you’ll know whether you’re a die-hard Mac lover or if PC has served you well (or both!). Some alumni reward themselves with a high-end Mac when they land a good job – because by then they know exactly why they want it (be it the display, the build, the ecosystem synergy for their lifestyle). Until then, focus on maximizing your learning opportunities. Your hardware should open doors, not close them.

Conclusion

Choosing between a MacBook and a Windows laptop with a strong GPU is a personal decision, and both have valid advantages. To recap our honest advice for a design student:

  • A Windows laptop likely gives you more raw power and compatibility for the money, which can be a boon during your exploratory college years.
  • A MacBook offers a refined experience and great integration if you’re already deep in Apple’s world, but it comes at a higher cost and with some limits in upgradability and niche software support.
  • Think about the specific tools you’ll need, and remember that college is a time to try new things – so err on the side of flexibility.
  • Consider a hybrid approach (PC + iPad) if you want the pen/tablet experience without committing your whole workflow to Mac.
  • Keep in mind factors like repairability, longevity, and total cost of ownership – these often tilt in favor of PCs for students.

No matter which you choose, what ultimately matters is the work you create and skills you build. Amazing design can happen on any platform. So equip yourself with something that empowers you, and then go create, experiment, and enjoy your journey in design school!

FAQ (Frequently Asked Questions)

Q: Do most professional designers use Mac? Will I be at a disadvantage with Windows?
A: It’s true that Macs have been popular in creative industries (partly due to historical reasons and great marketing), but Windows PCs are equally capable for design work. All major design software (Adobe CC, etc.) works the same on both. In fields like graphic design, you’ll find many pros on Mac, but in fields like 3D, game design, CAD, or even UI/UX, Windows machines are extremely common. You won’t be at a disadvantage skill-wise – design principles and software skills translate across OS. In fact, using Windows might expose you to a broader range of tools. The output of your work doesn’t depend on the OS; a Photoshop file or an Illustrator design is identical whether made on Mac or PC. So choose the platform you’re more comfortable with and that fits your needs. Both are used in the industry, and your portfolio will speak louder than your choice of computer.

Q: Can a MacBook run all the software I might need? What if I need a Windows-only program?
A: Modern Macs (with Apple Silicon) can run most, but not all, software design students might use. As discussed, some programs like SolidWorks, Revit, 3ds Max (and certain game engines or VR tools) are Windows-only. If you end up needing one of those on a Mac, your options are limited. You cannot dual-boot Windows on Apple M1/M2 MacBooks (Boot Camp is not supported on them), so you’d have to use a virtualization solution like Parallels Desktop. Parallels can emulate Windows and let you run many Windows apps on a Mac. However, performance will be reduced, and some 3D or GPU-intensive apps might not work properly (or at all) in virtualization. On older Intel-based Macs, you could install Windows natively via Boot Camp, which worked well, but those Macs are no longer the latest models. In short, if you know you’ll need a Windows-only app regularly, don’t get a Mac as your sole machine. If it’s just an occasional thing, you might get by with Parallels or using a lab PC as needed. Always check software requirements – it’s frustrating to discover mid-semester that an important app “requires Windows 10 or 11” and you have a Mac.

Q: Which one lasts longer – a MacBook or a Windows laptop?
A: Both can last through your 4-year degree and beyond. MacBooks are often praised for longevity – Apple controls the hardware and software, so macOS updates support models for many years, and the build quality is high. Many people use MacBooks for 5+ years. Windows laptops vary because there are so many brands, but a well-built one (think Dell XPS, Lenovo ThinkPad, etc.) can also easily last 5 years with proper care. One advantage with Windows is if something becomes a bottleneck (say you need more RAM in year 3), you might upgrade that part and extend the machine’s life. MacBooks don’t allow that, but they often “age gracefully” in terms of performance and macOS optimization. Also consider battery life decline: a Mac’s battery after 4 years might hold less charge and it’s expensive to replace via Apple; some Windows laptops let you swap batteries. Overall, Macs might have a slight edge in lifespan due to controlled design, but a good Windows laptop will last as long as you need and can even surpass if you do minor upgrades. Longevity also comes down to how you treat the device and whether its specs remain sufficient for evolving software (e.g. 8GB RAM might feel tight in a few years on either platform).

Q: What about display quality and color accuracy? Aren’t MacBook screens better for design work?
A: MacBooks (especially the Retina displays and the newer Liquid Retina XDR in MacBook Pros) have excellent displays – high resolution, wide color gamut (P3), and out-of-the-box color calibration that’s very good. This is great for visual work where color accuracy is important. Many Windows laptops now also offer high-resolution screens and even OLED displays or 100% sRGB/AdobeRGB coverage – but you have to choose the right model (and often pay extra for a “creator” edition or higher trim). It’s true that in the ₹1-1.5L range, some Windows laptops will come with a more modest 1080p screen to prioritize internals, whereas a MacBook at ₹1.5L will definitely have a beautiful high-res screen. If display quality is critical (e.g. photography or print design where you need color accuracy), you can either opt for a Windows laptop that specifically advertises a color-accurate display or use an external monitor down the line. Many designers use calibrated external monitors with their laptops (Mac or PC) for final color work. So yes, Macs have an advantage in built-in display quality generally. But a Windows laptop connected to a quality external display is equally effective. And some PCs like the Dell XPS or ASUS ProArt series have comparable screens. Don’t forget, if color is super critical, you’ll be doing test prints or using hardware calibrators regardless of Mac/PC. So while you’ll likely love a Mac’s screen, this factor alone might not outweigh other considerations – you can get by fine on a decent PC display for student work and upgrade your setup with a nice monitor later if needed.

Q: I’ve heard MacBooks have much better battery life. Is that true and important?
A: Apple’s newer MacBooks (with M1/M2 chips) are battery life champs. The MacBook Air and Pro can easily get 10-20 hours of light use on battery, which is way above many Windows laptops. If you value working untethered in the library all day, that’s a plus for Mac. Windows laptops with powerful GPUs tend to have poorer battery life, especially if you’re doing intensive work – you might get 4-6 hours of real-world use on a gaming laptop battery, sometimes even less, whereas a MacBook Pro might go 8-10 hours doing similar tasks. Part of this is Apple’s tight integration and efficient chips. That said, some newer Windows models with efficient CPUs or dual graphics modes (integrated graphics for battery, discrete GPU for power) can achieve moderately good battery life too, but generally Mac leads here. As a student, consider your use: if you frequently take notes in class or sketch on battery, a Mac is practically worry-free for a school day. With a Windows laptop, you might carry your charger and expect to plug in between classes. It’s a lifestyle factor. Mac does win on mobility and battery. If this is extremely important to you (and you can live without the higher-end GPU performance on battery), it might tilt you toward MacBook. Otherwise, you can manage with a PC by being mindful of settings (turning off the GPU when not needed, etc.) and charging when you can.

Q: Are Macs more secure or stable than Windows PCs?
A: Macs have a reputation for stability and security. macOS’s controlled environment means fewer random crashes (though it’s not immune – Macs do crash or beachball too). Windows historically had more issues with viruses/malware and system errors, but Windows 10/11 have improved stability greatly. If you practice common-sense habits (don’t download shady files, keep your system updated, use antivirus on Windows), you shouldn’t be overly worried on either platform. For security, macOS being less common means it’s targeted by fewer viruses, but there are Mac malware out there. Windows has a bigger target on its back, but also very robust security tools now (like Windows Defender). As for stability in the context of running design software: both are very stable in running Adobe, etc. I wouldn’t say a Mac will crash any less during a heavy Premiere Pro render than a similarly specced PC – that depends more on the application state and hardware health. Summary: Macs are a bit safer out-of-the-box for the non-tech-savvy (less exposure to malware), and the OS is solid. Windows gives you more freedom which can mean more ways to mess up if you’re not careful, but it’s also quite stable nowadays. As a student, just back up your work regularly (regardless of Mac or PC!) and you’ll be fine. Both OSes have backup solutions (Time Machine on Mac, File History or OneDrive on Windows).

Q: If I go with Windows now, can I switch to Mac later without much trouble?
A: Absolutely. The software skills you build will transfer. Adobe Creative Cloud files, for example, open on either platform. If you learn Blender or Rhino on Windows, those tools exist on Mac too. The main differences are in the OS interface and some shortcuts, but many designers use both OS over their careers. In fact, having familiarity with both Mac and PC is a plus. Switching from Windows to Mac later (or vice versa) might have a short adjustment period (learning Finder vs Explorer, installing apps from .dmg vs .exe, etc.), but it’s not too difficult. Many students use Windows at school and then end up at a job that gives them a Mac – they adapt quickly. The reverse is also true. Don’t worry that choosing one now locks you out of the other forever. It’s more important to focus on core design competencies and software proficiency, which are platform-independent. You might even find it easy to be “bilingual” in OS. And with cloud storage and platform-agnostic services, moving your files or workflow to a new machine is smoother than ever. So, you can always make the jump later on if you decide a Mac better suits your post-college needs.

We hope this deep dive has helped clear up your concerns. Remember, there’s no wrong choice – just the choice that best fits your needs and circumstances. Good luck with your studies, and happy designing! Keep creating, no matter what computer is in front of you.

The Ultimate Laptop Buying Guide for Design Students: Powering Your 4-Year Creative Journey | 2025

Estimated reading time: 7 minutes

1. Introduction: Why the Right Laptop Matters for Design Students

Embarking on a design degree is an exciting journey filled with creativity, experimentation, and technical learning. Your laptop is your primary tool — it must keep pace with evolving software demands, complex visuals, and multitasking needs. Picking the right laptop isn’t just about specs; it’s about future-proofing your education and creative potential over the next four years.

2. Understanding Design Workloads and Software Needs

Design is diverse. Fashion designers sketch and simulate garments; interior designers visualize spaces in 3D; communication designers juggle typography and video editing; while animation and game design students push GPUs to render immersive worlds. Here’s a snapshot of typical software you’ll encounter:

  • 2D & Vector Tools: Adobe Photoshop, Illustrator, Figma, Sketch
  • 3D Modeling & CAD: Blender, Rhino, Autodesk Fusion 360, SketchUp
  • Rendering & Animation: KeyShot, Maya, Unreal Engine, CLO 3D, Marvelous Designer
  • Video & Motion Graphics: Adobe Premiere Pro, After Effects

Each requires a mix of strong CPU performance, plenty of RAM, fast storage, and crucially, GPU acceleration for smooth rendering and previews.

3. Why GPU Acceleration is a Game-Changer in Design

The Graphics Processing Unit (GPU) accelerates visual computations, freeing your CPU to manage other tasks. For design students, GPU power impacts:

  • Real-time 3D viewport interaction — no lag, fluid navigation
  • Faster rendering and preview of high-resolution visuals
  • Accelerated AI-powered features like content-aware fills, style transfers, or generative design
  • Smooth multitasking with GPU-accelerated video editing and animation

As software integrates more AI and ray-tracing, having a capable GPU is no longer optional but a must-have.

4. Emerging Role of AI in Design Workflows

AI is reshaping design workflows — from automating repetitive tasks to inspiring creative ideation. Tools embedded with AI help:

  • Generate design variations quickly
  • Enhance image resolution and color correction automatically
  • Predict user behavior for UX/UI projects
  • Simulate fabric drape or lighting effects realistically

Choosing a laptop with hardware supporting AI accelerators and GPU compute capabilities prepares you for this fast-evolving landscape.

5. Setting Your Budget: How to Decide What to Spend

Budgeting your laptop purchase requires balancing your academic needs with financial planning. Consider:

  • Course requirements: Does your program demand heavy 3D or animation software?
  • Future growth: Will you explore advanced projects or freelancing during studies?
  • Portability vs performance: Are you commuting daily, or working mostly at a studio?
  • Upgradeability: Can you expand RAM or storage later?

Starting with a clear understanding of your software needs and budget constraints will guide you to the right tier.

6. Laptop Tiers Explained: Optimal, Medium, and Advanced

  • Optimal: Suitable for beginners focusing on 2D design, light 3D, and general academic work. Balances cost with performance for smooth learning.
  • Medium: Ideal for most students expanding into moderate 3D modeling, rendering, and video workflows. Offers future-proof specs and better multitasking.
  • Advanced: For power users tackling high-poly 3D, animation, game design, VR, and AI-powered simulations. High-end CPUs, GPUs, and displays ensure no bottlenecks.

7. Recommendations: Best Laptops for Different Design Disciplines

Below are curated laptop options for two broad pools of design disciplines. Each pool has recommended laptops classified by tier for your convenience.

Pool 01: Fashion, Interior, Communication, Interaction Design

Optimal Tier (3 options)

  1. HP Victus fa1382TX
    Link | ₹68,990
    Intel i7-12650H, RTX 3050 4GB, 16GB DDR4, 512GB SSD, 15.6″ FHD 144Hz
  2. Lenovo LOQ 2024 AMD Ryzen 7 8845HS (83DX005KIN)
    Link | ₹89,990
    Ryzen 7 7845HS, RTX 4050 6GB, 16GB DDR5, 512GB SSD, 15.6″ FHD+ 165Hz
  3. ASUS ROG Strix G16 (G614JU-N3200WS)
    Link | ₹1,13,500
    Intel i7-13650HX, RTX 4050 6GB, 16GB DDR5, 1TB SSD, 16″ FHD+ 165Hz

Medium Tier (3 options)

  1. Lenovo LOQ 2024 AMD Ryzen 7 (83JC00EHIN)
    Link | ₹90,151
    Ryzen 7 7435HS, RTX 4060 8GB, 24GB DDR5, 512GB SSD, 15.6″ FHD 144Hz, 100% sRGB
  2. HP OMEN Gaming Laptop (xf0060ax)
    Link | ₹1,05,990
    Ryzen 7 7840HS, RTX 4060 8GB, 16GB DDR5, 1TB SSD, 16.1″ FHD 165Hz
  3. HP OMEN Gaming Laptop (wd0012TX)
    Link | ₹1,15,000
    Intel i7-13620H, RTX 4060 8GB, 16GB DDR5, 1TB SSD, 16.1″ FHD 144Hz

Advanced Tier (3 options)

  1. Lenovo Legion Pro 5 AMD Ryzen (82WM00FFIN)
    Link | ₹1,98,656
    Ryzen 9 7945HX, RTX 4070 8GB, 32GB DDR5, 1TB SSD, 16″ WQXGA 240Hz
  2. Lenovo Legion Pro 5 Intel (83DF003NIN)
    Link | ₹1,55,999
    Intel i7-14650HX, RTX 4060 8GB, 16GB DDR5, 1TB SSD, 16″ WQXGA 240Hz
  3. MSI Vector 16 HX (A14VGG-279IN)
    Link | ₹1,79,990
    Intel i7-14700HX, RTX 4070 8GB, 32GB DDR5, 1TB SSD, 16″ QHD+ 240Hz

Pool 02: Product, Animation, Transportation, Industrial Design

Optimal Tier (2 options)

  1. HP Victus Gaming Laptop (fb3025AX) (Steal Deal : The price may change very soon)
    Link | ₹1,01,990
    Ryzen 9 8945HS, RTX 4060 8GB, 16GB DDR5, 1TB SSD, 15.6″ FHD 144Hz
  2. Lenovo LOQ 2024 AMD Ryzen 7 (83JC00EHIN)
    Link | ₹90,151
    Ryzen 7 7435HS, RTX 4060 8GB, 24GB DDR5, 512GB SSD, 15.6″ FHD 144Hz

Medium Tier (2 options)

  1. HP OMEN Gaming Laptop (xf0060ax)
    Link | ₹1,05,990
    Ryzen 7 7840HS, RTX 4060 8GB, 16GB DDR5, 1TB SSD, 16.1″ FHD 165Hz
  2. HP OMEN Gaming Laptop (wd0012TX)
    Link | ₹1,15,000
    Intel i7-13620H, RTX 4060 8GB, 16GB DDR5, 1TB SSD, 16.1″ FHD 144Hz

Advanced Tier (3 options)

  1. MSI Raider GE68 HX (14VIG-469IN)
    Link | ₹2,83,990
    Intel i9-14900HX, RTX 4090 16GB, 32GB DDR5, 1TB SSD, 16″ UHD+ MiniLED 120Hz
  2. Acer Predator Helios 16 (PH16-71)
    Link | ₹1,56,990
    Intel i9-13900HX, RTX 4070 8GB, 16GB DDR5, 1TB SSD, 16″ WQXGA 240Hz
  3. Lenovo Legion 5 Intel (83DG009DIN)
    Link | ₹1,65,999
    Intel i7-14650HX, RTX 4070 8GB, 16GB DDR5, 1TB SSD, 16″ WQXGA 165Hz

8. Final Thoughts and How to Reach Out

Choosing a laptop for design studies is an investment in your creative future. Whether you’re sketching fashion ideas or building immersive VR worlds, the right hardware unlocks your full potential.

We hope this guide helps you find the perfect machine tailored to your discipline, workflow, and budget.
* we do not endorse any brand and the prices mentioned are indicated and may change.

Have questions or want advice on a specific use case? Drop your thoughts and queries in the comments below — we’re here to help!

How to Replace Media Files in WordPress Without Changing the URL

Estimated reading time: 7 minutes

Introduction

If you’ve ever needed to update a file in WordPress—like a PDF or an image—you’ve probably run into the issue where WordPress changes the file’s URL after it’s been replaced. This can be particularly frustrating if the file is linked across multiple pages on your site, as it requires you to manually update each link.

By default, WordPress does not offer an option to replace an existing media file. When you upload a new file with the same name as an existing one, WordPress creates a new file with a modified name (usually appending -1, -2, etc., to the filename) and stores it in the uploads directory for the current month. This behavior preserves old files but isn’t ideal if you want to simply update a file and keep all existing links intact.

In this tutorial, I’ll walk you through how to create a custom WordPress plugin that allows you to replace media files without changing their URL. This is a handy tool if you need to update files frequently and want to avoid the hassle of broken links or outdated content.

The Problem: Changing URLs When Replacing Files

As mentioned earlier, WordPress’s default behavior is to avoid overwriting files with the same name. If you upload a file with the same name as an existing one, WordPress will automatically append -1, -2, etc., to the filename and store it in the uploads directory for the current year and month. This ensures that existing files are preserved, but it also means that any links pointing to the original file will now be broken unless manually updated.

This behavior is great for preserving old versions of files, but it’s not ideal if you want to replace a file and keep the existing URL intact. Fortunately, with a bit of custom code, you can modify this behavior to suit your needs.

Creating the Media File Replacer Plugin

Let’s build a custom WordPress plugin that allows you to replace a file in the media library without changing its URL. This plugin will let you upload a new file, overwrite the existing file, and keep the original URL.

Step 1: Setting Up the Plugin

First, create a new folder named media-replacer in your wp-content/plugins directory. Inside this folder, create a file named media-replacer.php and add the following code:

<?php
/*
Plugin Name: Media File Replacer
Description: Allows admin users to replace media files (e.g., PDFs) without changing the URL.
Version: 1.3
Author: Your Name
*/

// Function to add the "Replace File" link in the media library
function media_replacer_add_replace_link($actions, $post) {
    if ($post->post_mime_type == 'application/pdf') {
        $actions['replace_file'] = '<a href="' . admin_url('upload.php?page=replace-media&attachment_id=' . $post->ID) . '">Replace File</a>';
    }
    return $actions;
}
add_filter('media_row_actions', 'media_replacer_add_replace_link', 10, 2);

// Function to handle the file replacement page
function media_replacer_replace_file_page() {
    // Check if the user has the right capability
    if (!current_user_can('upload_files')) {
        wp_die(__('Sorry, you are not allowed to access this page.'));
    }

    if (isset($_GET['page']) && $_GET['page'] == 'replace-media' && isset($_GET['attachment_id'])) {
        $attachment_id = intval($_GET['attachment_id']);
        $attachment = get_post($attachment_id);

        if ($attachment && $attachment->post_mime_type == 'application/pdf') {
            if (isset($_FILES['new_file'])) {
                $new_file = $_FILES['new_file'];

                // Check if the upload has any errors
                if ($new_file['error'] == UPLOAD_ERR_OK) {
                    // Get the current file path
                    $old_file_path = get_attached_file($attachment_id);
                    $original_dir = pathinfo($old_file_path, PATHINFO_DIRNAME);
                    $original_filename = pathinfo($old_file_path, PATHINFO_BASENAME);
                    $new_file_path = $original_dir . '/' . $original_filename;

                    // Move the uploaded file to the original directory and overwrite the old file
                    if (move_uploaded_file($new_file['tmp_name'], $new_file_path)) {
                        // Update the attachment file path
                        update_attached_file($attachment_id, $new_file_path);

                        // Update the attachment metadata (like file size, etc.)
                        wp_update_attachment_metadata($attachment_id, wp_generate_attachment_metadata($attachment_id, $new_file_path));

                        echo '<div class="notice notice-success"><p>File replaced successfully.</p></div>';
                    } else {
                        echo '<div class="notice notice-error"><p>Error: The uploaded file could not be moved to the original directory.</p></div>';
                    }
                } else {
                    echo '<div class="notice notice-error"><p>File upload error. Please try again.</p></div>';
                }
            }

            // Display the upload form
            echo '<h2>Replace File</h2>';
            echo '<form method="post" enctype="multipart/form-data">';
            echo '<input type="file" name="new_file" accept="application/pdf" required />';
            echo '<br><br>';
            echo '<input type="submit" class="button button-primary" value="Replace File" />';
            echo '</form>';
        }
    }
}

// Function to add the hidden admin page for replacing media
function media_replacer_admin_menu() {
    add_submenu_page(
        null, // We don’t want this to appear in the menu
        'Replace Media', 
        'Replace Media', 
        'upload_files', // Capability needed to access this page
        'replace-media', 
        'media_replacer_replace_file_page'
    );
}
add_action('admin_menu', 'media_replacer_admin_menu');
Step 2: Activate the Plugin

After saving the code, go to your WordPress admin area and activate the plugin from the Plugins page. Now, when you go to the Media Library, you’ll see a “Replace File” link next to your PDF files.

Step 3: Replacing a File

Click the “Replace File” link, select your new file, and click the “Replace File” button. The new file will overwrite the old one, and the URL will remain unchanged. No more updating links across your site!

Conclusion

This plugin is a simple yet powerful tool for anyone who frequently updates media files on their WordPress site. It saves time and ensures that your URLs remain consistent, reducing the risk of broken links and improving your site’s overall user experience.

Feel free to download the plugin, modify it to suit your needs, and share it with others who might find it useful!

Download the Media File Replacer Plugin here.


Choosing the Right Laptop for Design Students in 2024 June- Dec

Estimated reading time: 4 minutes

When starting your journey in design, selecting the right laptop is crucial. While the market is filled with numerous options, we have curated a list of models that offer the best value for money, build quality, and performance. These laptops are suitable for moderate computing usage and can handle all graphic processing requirements of a design workflow. However, those interested in exploring 3D software and game engines should consider more advanced options.

We hope this guide helps you make an informed decision. If you need any further help feel free to contact in comment section for any related queries.

Category 01: Fashion Design & Styling, Interior, Furniture Design, Global Design

HP Victus Gaming Laptop
Amazon Link: HP Victus Gaming Laptop
Processor: AMD Ryzen 7 7840HS AI Powered
GPU: 6GB RTX 3050
Screen: 16.1-inch (40.9 cm) FHD, IPS, 144Hz
RAM: 16GB DDR5
SSD / M.2: 1TB SSD
Additional: RGB Backlit Keyboard, B&O Audio

Lenovo LOQ AI Powered
Amazon Link: Lenovo LOQ AI Powered
Processor: AMD Ryzen 7 7840HS
GPU: NVIDIA RTX 3050 6GB
Screen: 15.6″ (39.6 cm) FHD, IPS, 144Hz
RAM: 16GB
SSD / M.2: 512GB SSD
Additional: Office 2021, 3 Month Game Pass, Legion Bag

HP OMEN Gaming Laptop
Amazon Link: HP OMEN Gaming Laptop
Processor: Intel Core i7-13700HX
GPU: 6GB RTX 3050
Screen: 16.1-inch (40.9 cm) FHD, IPS, 165Hz
RAM: 16GB DDR5
SSD / M.2: 512GB SSD
Additional: RGB Backlit Keyboard, B&O Audio

Category 02: Product Design, Visual Communication, Interaction Design, Game Design and Simulation, Automobile & Transportation Design

HP OMEN Gaming Laptop
Amazon Link: HP OMEN Gaming Laptop
Processor: AMD Ryzen 7 7840HS
GPU: 8GB RTX 4060
Screen: 16.1-inch (40.9 cm) FHD, IPS, 165Hz
RAM: 16GB DDR5
SSD / M.2: 1TB SSD
Additional: RGB Backlit Keyboard, B&O Audio

Lenovo LOQ
Amazon Link: Lenovo LOQ
Processor: Intel Core i7-13620H
GPU: NVIDIA RTX 4060 8GB
Screen: 15.6″ (39.6 cm) FHD, IPS, 144Hz
RAM: 16GB
SSD / M.2: 512GB SSD
Additional: Office 2021, 3 Month Game Pass

MSI Katana 15
Amazon Link: MSI Katana 15
Processor: Intel Core i7-13620H
GPU: NVIDIA RTX 4060
Screen: 40CM FHD, 144Hz
RAM: 16GB
SSD / M.2: 1TB NVMe SSD
Additional: Windows 11 Home

Lenovo Legion Slim 5 AI Powered
Amazon Link: Lenovo Legion Slim 5 AI Powered
Processor: AMD Ryzen 7 7840HS
GPU: NVIDIA RTX 4060 8GB
Screen: 16″ (40.64 cm) WQXGA, IPS, 165Hz
RAM: 16GB
SSD / M.2: 512GB SSD
Additional: Office 2021, 3 Month Game Pass

Category 03: For Serious Game Developers, AI Explorers, and 3D Simulators

ASUS TUF Gaming A15 (2024)
Amazon Link: ASUS TUF Gaming A15 (2024)
Processor: AMD Ryzen 9 8945H
GPU: NVIDIA RTX 4070
Screen: 15.6″ (39.62 cm) FHD, 144Hz
RAM: 16GB DDR5
SSD / M.2: 1TB SSD
Additional: Windows 11, Office 2021

HP OMEN Gaming Laptop
Amazon Link: HP OMEN Gaming Laptop
Processor: AMD Ryzen 9 7940HS AI-Powered
GPU: 8GB RTX 4070
Screen: 16.1-inch (40.9 cm) FHD, IPS, 165Hz
RAM: 16GB DDR5
SSD / M.2: 1TB SSD
Additional: RGB Backlit Keyboard, B&O Audio

ASUS ROG Strix G16 (2024)
Amazon Link: ASUS ROG Strix G16 (2024)
Processor: Intel Core i9 14900HX
GPU: NVIDIA RTX 4070
Screen: 16″ (40.64 cm) QHD+, 240Hz
RAM: 16GB DDR5
SSD / M.2: 1TB SSD
Additional: Windows 11, Office 2021

MSI Sword 16 HX
Amazon Link: MSI Sword 16 HX
Processor: Intel 14th Gen. i7-14700HX
GPU: NVIDIA RTX 4070
Screen: 41CM 16:10 FHD+, 144Hz
RAM: 16GB
SSD / M.2: 1TB NVMe SSD
Additional: Windows 11 Home

We do not endorse or recommend any particular brand, but the listed ones have well-earned reputations in the market. Feel free to explore any brands of your choice with similar configurations.

The author has 20+ years of experience with teaching design software across disciplines in top design colleges in India. He is an interdisciplinary designer specializing in user interaction design and product design.

Note: We do not advise choosing MacBooks due to potential compatibility issues, but this is a personal decision. Those who wish to buy MacBooks should ensure compatibility with the software taught in their domain. Refer to the first comment for general consideration while deciding for a laptop.

Design School 2.0: Why Design Education Needs a Technological Reboot?

Estimated reading time: 5 minutes

The Artistic Origins

Consider the journey of a design educator over the past couple of decades at India’s top design schools. When they first started teaching, the curricula were heavily steeped in artistic traditions. Students were compulsorily given courses on art appreciation, history of art and design, aesthetics, and the like.

Design students were dutifully immersed in the artistic origins and influences that shaped design movements over the past century. While incredibly valuable, there was a noticeable blind spot: there was almost never any study of the history and evolution of technology itself as a driver of design. At the time, this pedagogical approach tracked with conventional wisdom in the field. The industrial and digital revolutions were still relatively new. Design was taught through the framings and philosophies guided by artistic values.

But as the years progressed, a nagging sense grew that something was amiss. The design world was being reshaped by powerful technological forces. The user-centered paradigm was taking hold, demanding optimization for functional experience above aesthetic considerations. Students needed more than just an artistic grounding.

Resisting Evolution

For a while, there was a strange fundamentalism—a dogmatic devotion to rote processes handed down from past generations. Perhaps rooted in academia’s predisposition towards tradition. Change is difficult, even when surrounding contexts shift rapidly.

In retrospect, the truth was glaring: Digital technology was no longer politely knocking. It had violently barged in and altered everything from visual culture to product and tool design. The shift to user-centricity unleashed massive demand for delightfully personalized experiences, driven by code and software. Designers were suddenly being asked to think like technologists, not artisans. And academia was inadequately preparing them.

Artistic philosophies alone were insufficient to navigate this new world of iPhones, apps, websites, wearables, and emerging digital products/interfaces. Art’s influence on aesthetic sensibilities was being democratized by social media and trends like hyperpersonalization. While art’s societal importance endured, the design paradigm had permanently pivoted pragmatically. Technology was now the paramount driver and canvas. Pedagogy had to evolve. Teaching technology as just siloed software skills wasn’t enough. A true technological mindset and consciousness were needed from day one, just like the artistic lens.

The Technological Takeover

An ethos of “tech-first design” should bleed into every vertical—not just UI/UX but industrial, fashion, architecture and beyond. For digital experiences weren’t niche use cases; they were the new environment. The realization slowly permeated curricula over 5–10 years. Top programmes prioritized human-computer interaction, programming, user research, UI/UX patterns, and systems thinking. Smart designers cultivated multilingual fluency, conversing eloquently in aesthetics and technology. This combination enabled graceful products blending beauty and function.

The transition has not been easy for many tradition-bound design institutions. A significant number of faculty members across various design institutions still resist evolving beyond their artistic comfort zones, clinging tightly to the comfortable but increasingly obsolete models of the past. There is an inherent skepticism and passive resistance toward wholeheartedly adopting a “tech-first” mentality in their pedagogical philosophies.

Transitioning Slowly

In the Indian context especially, design academia has been slow to truly imbibe and integrate technological skills and mindsets as co-equal pillars alongside art fundamentals. While pockets of programs are making positive strides, there remains a predominant fundamentalism—an overt devotion to teaching design primarily through the lenses of aesthetics, artistic heritage and manual processes.

The risks of this inertia are real. Failing to embrace and balance technological mastery with design’s traditional art bases risks leaving entire generations of students ill-prepared for the innovative, product-driven markets they’ll be entering. Their skillsets may prove embarrassingly antiquated in the face of rapidly evolving digital experiences and user expectations.

There is also a danger of overcorrecting by losing sight of design’s invaluable artistic core as excitement builds around prioritizing technological capabilities. The strengths of both disciplines must be thoughtfully interwoven. The path forward, while clear, will require bold leadership and tough decisions. Preserving hallmarks of art education is wise, but continuing to quarantine technology as an ancillary dimension means abdicating design academia’s duty to properly equip students for the modern realities they’ll navigate as professionals.

Design curricula must fully embrace the balanced, interwoven study of aesthetics and technology as co-equal focuses. In today’s world, digital product experiences are not niche use cases that designers can still avoid. They have become the very environment we breathe, the water we swim in. The future is already here; academic models simply need to evolve in parallel to adequately prepare students.

Thanks for your time! I would love to hear about what you think in the comment section.

Problem: To show thumbnails of images hosted on Google Drive in the Google Sheets

Estimated reading time: 7 minutes

How Did I End Up with This Problem?

Google Drive has generously allowed developers to use it for hosting images and fetching them via a shareable link to embed in the browser until the beginning of 2024. Last year, when I was working on a self-fun project for “creating a gallery that could fetch content from a Google Sheet connected to a form for collecting responses,” I could publish the Google Sheet and use the URL to fetch all the data, which included text, URLs, and images via Google Drive links.

GitHub Repo (feel free to use the codes) GitHub Page (Notice that the images are showing as broken links now)

After this project, I was happy to have this solution at my disposal whenever I wanted to use it in the future. But to my surprise, when I actually needed to create a gallery for showcasing the works of students for the “Generative AI module,” it did not work. I thoroughly reviewed the codes, but everything seemed perfect. However, after checking online, I found out that Google has changed its policy for Google Drive-hosted images.

For a few days, I kept looking for a solution but couldn’t find one. I tried the following things:

  1. Creating a WordPress plugin that could fetch the contents from Google Sheets (I have actually managed to create a working plugin with the help of ChatGPT, but the problem remained the same. It couldn’t fetch the image content. I tried changing all MIME types and writing app scripts to change the Google Drive URLs to absolute paths, but nothing worked, and I finally gave up).
  2. Then I tried looking for existing plugins, free/paid, and ended up getting a very good one, but that also had issues in terms of fetching the images and displaying them as featured images. This was needed because I wanted to convert one form entry into a post and later make post grids, which would have been connected with a modal allowing viewing of the images and related text.

After trying for a few days, I accepted defeat and moved on to find a way to export data into some format that could be used for bulk post creation. At some point, I managed to pull the images too, but couldn’t set them as a featured image automatically. Manually doing it would have defied the objective, as the quality of entries was exhaustive.

The Workaround

I had to create the gallery anyway, so I focused on minimizing the effort of selecting the best submissions and doing it manually. Now, this required me to go through each and every submission in Google Sheets, check for the image by clicking on it or hovering and waiting for it to pop up and show the thumbnail. This was also consuming a lot of time. So, I started looking for a way to somehow use the URLs and fetch the thumbnails of the images and show them next to the URL in the same row.

I found out the =IMAGE(source, mode, height, width) formula, which could do the trick but it wasn’t working since it clearly mentioned that it would only support images not hosted on Google Drive.

I was disappointed and almost decided not to pursue this challenge anymore. I took a break from it and got engaged with other things. Two days later, the eureka moment came! While working on another problem, I stumbled upon a tiny article, which rekindled my desire to solve the previous problem. I realized that maybe Google won’t allow me to fetch the source image due to a change of policy, but what about the thumbnail of the image? I only needed to see a small preview of the URL images to make an informed decision about choosing that entry in the showcase.

The Solution

Well, if you’re thinking just replacing the word “thumbnail” with “open” in the Drive link would work, then you’re wrong! I was wrong too 🙂 at first. But then, after fiddling around, I have found the right method which I am sharing below.

Step 01

This is how the URL is formatted after form submission in Google Sheets (https://drive.google.com/open?id=1scgs5T8k8Big5tjjAdh0weaM591dqteH). Make a copy of all the URLs in the next column.

Step 02

We have to convert all the URLs into file chips. This can be done by going to Insert > Smart chips > Convert to file chips.

Step 03 

Now we have to extract the url from file chips on the next column. To do that hover on the file chip in first row and click on Data Extraction

This shall open a sidebar with options to extract the URL to a target cell. Choose the cell next to the file chip cell and click on Extract. This will generate a URL like below:

https://drive.google.com/open?id=1zkDhy1XC7Q9uyQMKRPdq-Dq5QHA27sKu (This may look like the same URL, but it’s different because I tried directly using the =IMAGE() formula by replacing the “open” to “thumbnail,” but it did not work.

Step 04

Replace the word “open” with “thumbnail”. Use find and replace from the edit menu. Make sure to select only the range of extracted URLs, not the entire sheet.

This should look like this: https://drive.google.com/thumbnail?id=1zkDhy1XC7Q9uyQMKRPdq-Dq5QHA27sKu

Final Step

Use =IMAGE() formula to create thumbnails like below Learn more 

This looks like a lot of work. However, it helped tremendously and saved a lot of time for me. You may find many other use cases for this solution. This hack works! Further, I am looking for a way to do this entire process with a single click via App Script. Will keep you guys posted if that happens. Thank you for your time.

Content Overload: The Perils of On-Demand Culture and the Pursuit of Patience

Estimated reading time: 4 minutes

In our fast-paced, technology-driven world, we have become accustomed to the convenience of on-demand content. With a few taps on our screens, we can access a vast array of movies, TV shows, music, and information at our fingertips. While this may seem like a luxury, are we inadvertently fostering a culture of impatience and dependence?

The lure of on-demand content is undeniable. It offers us the ability to consume media at our own pace, tailored to our preferences. However, as this convenience becomes the norm, we risk losing the ability to appreciate delayed gratification and the value of patience. As we demand more and more content, the industry responds by providing it at a breakneck pace. Algorithms curate personalized playlists and recommendations, further fueling our insatiable appetite for new content. This cycle of constant consumption can lead to a sense of restlessness and a lack of focus, as we constantly seek the next piece of entertainment or information.

The abundance of choice can paradoxically lead to indecision and anxiety. With so many options available, we may find ourselves paralyzed by the tyranny of choice, unsure of what to consume next. This dilemma can exacerbate feelings of impatience and a sense of dissatisfaction with the content we ultimately choose.

The rise of on-demand streaming platforms has only exacerbated this trend. Users often find themselves endlessly scrolling through content, unable to settle on a single show or movie, constantly seeking the “perfect” viewing experience. This constant search can lead to a distorted perception of time and a sense of dissatisfaction, as we become accustomed to the rapid pace of content delivery.

As a society, we must confront the impact of this on-demand culture on our collective attention span, mental well-being, and ability to engage deeply with ideas. The constant barrage of content can erode our capacity for focused thought, contemplation, and meaningful connection. To address this challenge, we must cultivate a more mindful and intentional approach to content consumption. This may involve setting boundaries, prioritizing quality over quantity, and embracing the value of delayed gratification.

By fostering a culture of patience and deep engagement, we can reclaim our ability to think critically, appreciate the nuances of complex ideas, and cultivate a more balanced relationship with the digital world. It is crucial that we have open and honest conversations about the long-term consequences of our on-demand culture, and work towards building a society of individuals who are resilient, thoughtful, and capable of navigating the complexities of the digital age.

Featured Image : Dall-E
Prompt: Create an image with the person’s face looking straight towards the camera, wearing a virtual reality-like headset. Surround the face with an array of vivid streaming platform logos and various forms of media content, enhancing the colorful, disjointed, and hypnotizing effect. The image should focus centrally on the entranced expression of the person, overwhelmed by the allure of on-demand media, with the face oriented directly towards the viewer. Maintain the wide aspect ratio of 16:9.

The God Complex: How UX Designers are Hijacking User Experiences

Estimated reading time: 4 minutes

There’s no denying the growing influence of UX designers in shaping our digital experiences. But have they succumbed to a “god complex” – overestimating their ability to define and solve user needs based on secondhand experiences? It’s a concerning trend that warrants closer examination.

UX designers often find themselves in a position of power, openly debating user needs and proposing solutions that they deem to be the “ultimate” experience. In the process, they may be losing sight of the true purpose of design – to empower and engage users, not to dictate their interactions.

The desire to create “exclusive” and “hyper-personalized” experiences can lead to the creation of systems that require less and less effort from the user. But is that truly the hallmark of a rewarding experience? The question we must ask is whether reduced engagement can offer better and more satisfying interactions.

There’s a concerning trend of UX designers solving problems that don’t exist, inventing challenges just to showcase their “creative” solutions. This practice not only undermines the credibility of the field but also raises questions about the true motivations behind these “case studies.”

The problem extends beyond just UX design; it’s a plague that has infected many design disciplines. The rhetoric of “original ideas,” “creativity,” and “intuitive interfaces” often feels more like a marketing ploy than a genuine effort to facilitate user experiences.

Why do UX designers assume that users are not smart enough to navigate their own experiences? Why do they feel compelled to offer solutions for simple problems that could be addressed on an individual level? By stripping away the opportunity for human learning and exploration, are they not doing a disservice to the very people they claim to serve?

It’s time to question the notion of “human-centricity” in UX design. Is it truly a reflection of the user’s needs, or is it simply a trend that has been co-opted by practitioners seeking to validate their own importance?

#UXDesign #UserExperience #DesignEthics #HumanCentricity #DesignCritique #DesignTrends


Featured image: Dall-e
Prompt: In a pristine, clinical environment, a single, large UX designer commands the scene, their hand gesture meticulously detailed and deliberate. Dressed in a funky T-shirt, now with ‘UX/UI’ written in even bolder letters than before, a radiant halo shines from behind, underscoring their authority and control. The designer’s hands point directly downwards, with each of the five fingers distinctly extended, each connecting to multiple strings. These strings lead to numerous small, puppet-like figures tangled in a chaotic array of strings, which are attached to various digital screens, including phones, laptops, and tablets. This setup symbolizes the designer’s domineering influence over the user experience, portraying them as detached and manipulating users to serve hidden agendas. The image serves as a potent visual metaphor, sparking discussion on ethical design practices by highlighting the contrast between manipulative control and the genuine needs of users. The background remains sterile and unfocused, ensuring the designer’s solitary figure and the complex web of control are the focal points, without any replication or distortion of the designer figure.

A Glimpse into the Future: Unpacking AI at UID’s Faculty Development Programme

Estimated reading time: 4 minutes

At the heart of the rapidly evolving digital landscape, Artificial Intelligence (AI) stands as a beacon of progress and potential. The Faculty Development Program (FDP) conducted at UID, Karnavati University, led by Associate Professor Rajeev Kumar, offered an immersive exploration into the realms of AI, drawing connections from its mythological roots to its present and future impact on our world.

From Myths to Reality: The Evolution of AI

The FDP journey began with a fascinating exploration of AI’s evolution. AI, once a concept confined to the realms of mythology and science fiction, has now become an integral part of our everyday lives. The session delved into historical myths, like the ancient Greeks’ automatons and the Golems of Jewish folklore, showcasing humanity’s age-old fascination with creating life-like intelligence.

This narrative seamlessly transitioned into the scientific aspirations of figures like René Descartes and Charles Babbage, whose visions laid the foundational stones for today’s computational marvels.

Milestones of AI: A Journey Through Time

A significant portion of the presentation was dedicated to pivotal milestones in AI, marking the journey from theoretical concepts to tangible reality. Highlights included Alan Turing’s Turing Test, the development of the first AI program, the Logic Theorist, IBM’s Deep Blue’s historic chess victory, and the deep learning revolution of 2012. Each milestone underscored the exponential growth and potential of AI technologies.

Today’s AI: Transforming Industries

The conversation shifted to the current landscape of AI, emphasizing its transformative role across various sectors. From revolutionizing healthcare and automotive industries to redefining customer service through AI-powered chatbots and virtual assistants, the session painted a vivid picture of AI’s ubiquitous influence.

The Mind Maps: Visualizing AI’s Ecosystem

A unique feature of the presentation was the use of mind maps to visualize the complex ecosystem of AI. These mind maps served as a graphical representation of AI’s applications and their interconnected impact on digital ecosystems, including the Metaverse, Web 3.0, Digital Twins, and the Internet of Things (IoT). These visual aids were not only insightful but also fostered a deeper understanding of the subject among the participants.

Philosophical Implications: Navigating the Future with AI

The session concluded with a thought-provoking discussion on the philosophical implications of AI, touching upon questions of creativity, personhood, and ethics. Can AI be truly creative? Do advanced models raise questions about consciousness? How do we address the ethical challenges posed by AI, including biases and societal impacts?

Wrapping Up with a Forward-Look

As we wrapped up the session, the atmosphere was abuzz with curiosity and excitement for the future that AI holds. The FDP not only provided a comprehensive overview of AI’s journey and its current landscape but also sparked critical thinking among design educators about integrating AI knowledge into their teaching and research.

This blog post, accompanied by the detailed mind maps from the presentation, serves as a reminder of our shared exploration into AI at UID. It is a testament to our ongoing journey towards understanding and harnessing the potential of AI to reshape our world.

Effortlessly Convert Word Documents to PDFs in Google Drive: A Simple Guide for Everyone

Estimated reading time: 6 minutes

Introduction:

Have you ever found yourself drowning in a sea of Word documents, wishing there was an easy way to convert them all into PDFs without the hassle of manual labor? Whether you’re tidying up your digital workspace, preparing documents for sharing, or simply looking to make your files more accessible and secure, we’ve got a solution that can save you hours of tedious work. In this post, we’ll walk you through a simple, automated process to convert your Word documents to PDFs directly within Google Drive, tailored for those who might not have a technical background.

Questions this will answer for you!

  1. Do you often struggle with converting multiple Word documents into PDFs, wishing there was a way to automate this time-consuming task?
  2. Have you ever needed to quickly convert a batch of job applications, project proposals, or class assignments from Word to PDF, but found yourself bogged down by the process?
  3. Are you looking for an efficient way to manage your files on Google Drive, especially when it comes to ensuring your documents are in the right format for sharing or archiving?
  4. Do you wish to leverage the power of automation to streamline your document management process but don’t know where to start?

The Solution: Simplifying Conversion with Google Apps Script

Converting Word documents to PDFs in Google Drive doesn’t have to be a manual or daunting task. By using Google Apps Script, a potent yet accessible automation tool provided by Google, you can easily set up a script that does the heavy lifting for you. This guide will introduce a straightforward script that automatically converts any Word documents in a specified Google Drive folder into PDFs, storing them neatly in a designated folder.

Step-by-Step Guide for Non-Tech Users:

  1. Setting Up Your Google Drive: Begin by organizing your Word documents in a specific folder within Google Drive. This will be your source folder where the script will look for files to convert.
  2. Creating the Google Apps Script: We’ll guide you through creating a new script project directly from Google Drive, a process that’s as simple as creating a new document.
  3. Scripting Made Easy: No need to worry about coding; we’ll provide you with a ready-to-use script. All you need to do is copy and paste it, with clear instructions on where to customize the folder names.
  4. Running Your Script: With just a click of a button, your script will start converting all the Word documents in your source folder into PDFs, automatically saving them in a specified target folder.
  5. Enjoying the Benefits of Automation: Sit back and see how this simple automation saves you hours, allowing you to focus on more important tasks.

Step 1: Ensure Your Word Documents are in Google Docs Format

First things first, Google Drive shines when working with its native formats (Google Docs, Sheets, etc.). To smoothly convert your Word documents to PDFs, they should be in Google Docs format. Here’s how to check and convert:

  • Check Format: Double-click a Word document in Google Drive. If it opens in Google Docs, you’re all set. If it downloads or prompts you to download, it’s still a Word document.
  • Convert to Google Docs: Right-click the Word document in Google Drive, select “Open with,” then choose “Google Docs.” This creates a new document in Google Docs format.

Tip: To automate this for future uploads, adjust your Google Drive settings to automatically convert uploads to Google Docs format. Find this option in Drive settings under “General” > “Convert uploads.”

Step 2: Use Google Apps Script to Convert Documents

Google Apps Script is a powerful tool that can automate tasks in Google Drive, including converting documents. Don’t worry; you won’t need to write any code yourself. Just follow these simple steps:

  1. Create a New Script:
    • In Google Drive, right-click and select “New” > “More” > “Google Apps Script.”
    • Title your new project something descriptive, like “Doc to PDF Converter.”
  2. Copy and Paste the Script:
    • Erase any code in the script editor and copy-paste the following script:
  • Replace 'Your Source Folder' with the name of your folder containing the Word documents.
  1. Run the Script:
    • Click the play button (▶) in the toolbar. The first time you do this, Google will ask for permissions. Review and accept them.
    • If the run button is greyed out, make sure you’ve selected the function convertDocsToPDF in the dropdown next to the play button.

Step 3: Locate Your PDFs

After running the script, find a new folder in your Google Drive named “PDFs” (or whatever you named it), containing the converted documents. Voilà! Your documents are now accessible as PDFs.

Conclusion:

There you have it—a straightforward, no-fuss method to convert Word documents to PDFs within Google Drive, no tech expertise required. This process can streamline your document management, making sharing and viewing documents a breeze across different platforms and devices. Embrace the digital ease, and let Google Drive do the heavy lifting for you.

Happy converting!